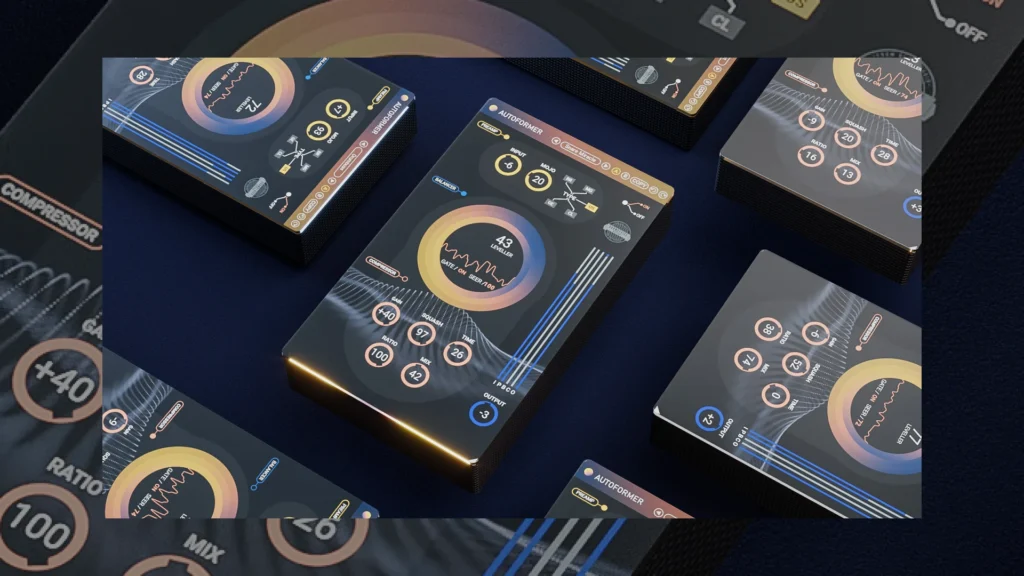
In modern audio mixing, controlling volume inconsistencies while maintaining musical warmth is a constant challenge. Traditional compression alone can sometimes choke a signal, while manual volume automation takes hours of painstaking work. Enter the United Plugins Autoformer—a sophisticated dynamic processor designed to combine automatic volume riding, pleasant analog-style saturation, and a versatile compression engine into a single interface.
In this article, we break down everything you need to know about Autoformer, exploring its core sections, advanced workflow features, and how to integrate it into your professional studio sessions.
Table of Contents
1. What is Autoformer? An Overview
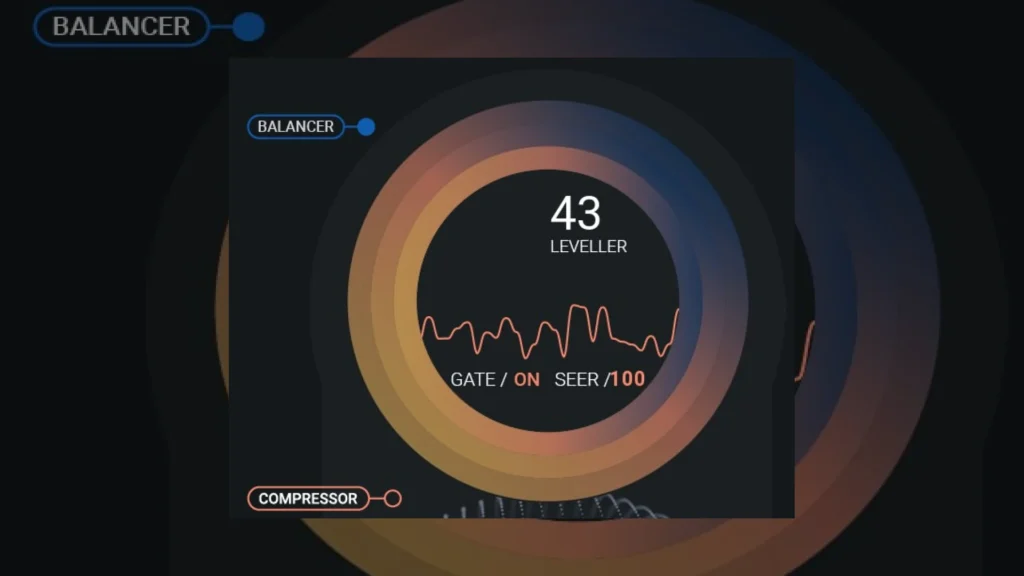
Autoformer is much more than a standard compressor. At its core, it features an intelligent automatic volume adjustment function paired with rich saturation and a robust compression engine. Whether you are leveling a dynamic vocal performance, smoothing out a bass guitar, or adding cohesion to an instrument bus, Autoformer acts as an all-in-one dynamics manager that preserves the natural feel of the audio while keeping peaks and troughs tightly controlled.
2. Interface and Scalability
One of the standout design choices of Autoformer is its user interface adaptability.
-
Scalable GUI: The plugin automatically adapts to your display resolution, looking consistent across both low-DPI screens and modern high-DPI/Retina monitors.
-
Manual Resizing: You can easily drag the bottom-right corner of the interface to change its size. Scale it down to preserve valuable screen space or enlarge it for meticulous, hands-on adjustments.
-
Independent Bypass Switches: Every major section is equipped with an individual bypass toggle, allowing you to isolate specific processing stages and evaluate their exact impact on your tone.
3. Deep Dive into the Processing Sections
Preamp Section
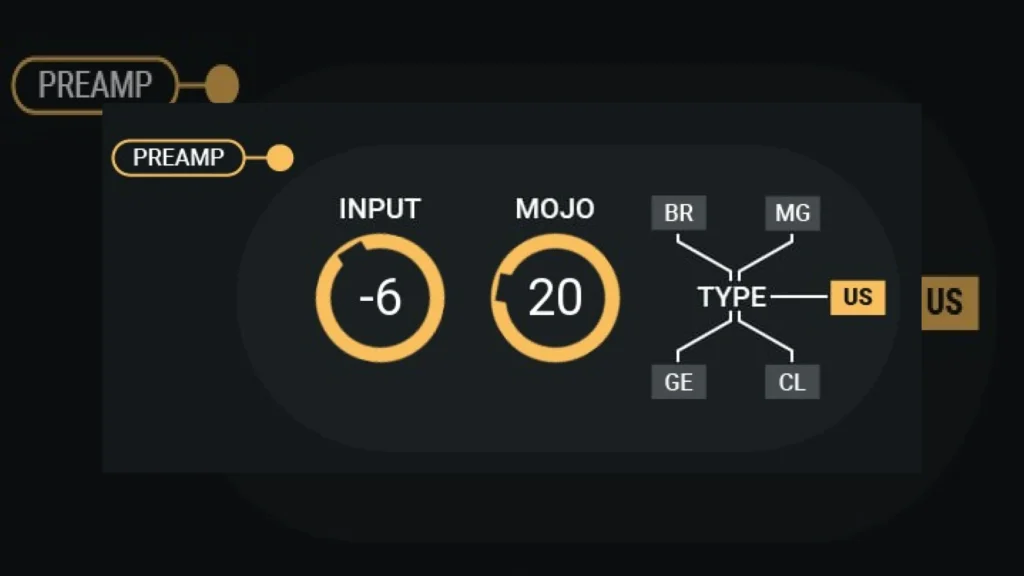
The preamp stage shapes the fundamental character of your input signal before it hits the dynamic processors.
-
INPUT: Acts as the input gain control, regulating how hard the signal drives into the plugin with a range from -24 dB to +24 dB.
-
BR / MG / US / CL / GE Buttons: These buttons alter the behavior and harmonic color of the analog circuit, offering British, American, and German emulation styles.
-
MOJO: Controls the saturation intensity, dictating how much rich color is introduced into the audio stream.
Balancer Section
The Balancer is where the intelligence of Autoformer shines, acting as an automated volume rider.
-
LEVELLER: Determines the power and intensity of the intelligent volume riding.
-
SEER: Looks ahead at the incoming signal to decide when the Leveller should engage. A higher setting delivers more precise volume attenuation, though it introduces a slight increase in latency. Note: Avoid tweaking this parameter during playback.
-
GT: Controls the activation and deactivation of the gate integrated within the Balancer algorithm.
Compressor Section
Positioned after the Balancer and Preamp stages, the compressor section glues the performance together.
-
GAIN: Controls the makeup gain amount specific to the compressor section.
-
SQUASH: Sets the overall complex level of applied compression.
-
TIME: Determines the time constants (attack and release characteristics) of the compression engine.
-
RATIO: Sets the compression ratio. Pushing this to its maximum value transforms the ratio to 1:infinity, turning the compressor into a brickwall limiter.
-
MIX: A wet/dry control that lets you blend the compressed and uncompressed signals for parallel compression techniques.
Output Section and Meters
-
OUT: Manages the overall output volume of the plugin, ranging from -24 dB to +24 dB.
-
Meters Guide:
-
I: Input signal volume (pre-preamp).
-
P: Preamp section output volume.
-
B: Gain reduction amount of the Balancer section.
-
C: Compressor section gain reduction.
-
O: Overall output level.
-
4. Workflow Enhancements: Presets, A/B Testing, and Context Menus
Autoformer incorporates several utility features designed to speed up your session workflow:
-
A/B Comparison and Copy: The plugin stores two independent sets of settings (A and B). Clicking between them highlights the active choice in red, making split-second comparisons effortless. The Copy button duplicates your current settings over to the alternate slot.
-
Presets Management: Factory presets provide immediate starting points for various instruments. Navigate them using the left/right arrows or by clicking the preset field directly.
-
Custom presets are stored locally on your machine at:
-
Windows:
c:UsersUSER NAMEAppDataRoamingUnitedPluginsPRESETSAutoformer -
macOS:
/Users/username/Library/Application Support/UnitedPlugins/PRESETS/Autoformer
-
-
-
Background Right-Click Menu: Right-clicking anywhere on the background provides shortcuts to scale the GUI by percentage, check version info, access online documentation, open the local preset folder, manage plugin licenses, and toggle GPU Acceleration or Intelligent Sleep on Silence (which disables processing when no audio is present to save CPU power).
-
Parameter Interactions: Right-clicking any parameter opens a menu for descriptions or resets, while double-clicking knobs allows for precise numeric value entry.
FAQ – Frequently Asked Questions
Can I use Autoformer on vocals and instruments alike?
Yes. Because it combines smooth leveling, vintage saturation, and flexible compression, Autoformer excels on lead vocals, bass guitars, acoustic instruments, and dynamic mix busses.
What does the SEER parameter actually do?
SEER is a look-ahead detector that prepares the Leveller section for upcoming signal transients. While higher values yield more precise volume riding, keep in mind that it increases plugin latency, so it should not be adjusted dynamically during playback.
How do I install and activate Autoformer?
You can easily install, update, and manage your license using the official UnitedPlugins Manager available in the downloads section of their website. Alternatively, clicking the Activate button inside the plugin lets you locate your license file directly.
Ready to streamline your dynamics processing?
Explore more tools and download updates directly through the United Plugins Manuals page.
Category: Audio Engineering & Mixing Tools
Tags: AudioProduction, UnitedPlugins, Autoformer, MixingTips, Compression, VocalLeveling

Written by SM Mastering
Official content on sound engineering, mixing, mastering, and advanced electronic production by SM Mastering.
Want Your Track to Sound Professional?
Don’t let muddy mixes hold your music back. Get commercial loudness and clarity today.